

How To Scan Windows 8 For Virus
If you think yous've been infected with malware, the best affair to do is to avoid panicking. In many cases, you can recover your PC and remove the infection past using Windows' ain Microsoft Defender tool or by using third-party antivirus software like Avast to scan for and remove the infection.
Even stubborn malware infections can be removed using these tools, but y'all may need to run a boot-level scan using portable software on a USB bulldoze, especially if Windows isn't safe to run with malware. To run an offline virus browse using Microsoft Defender or a third-party antivirus solution, y'all'll need to follow these steps.
Running an Offline Virus Scan Using Microsoft Defender on Windows 10
If Windows is still running and the malware infection isn't as serious, you may exist able to utilize Microsoft Defender to run a bootable antivirus browse without using the portable (and older) Windows Defender Offline tool.
This selection is only recommended, nevertheless, if Windows is even so able to run and remains isolated from other PCs on your network.
For instance, if y'all intend to use this method, make certain that your PC is disconnected from your local network. This will prevent any malware from potentially spreading to other PCs earlier y'all can clear the infection. You may wish to restart Windows in Safe Manner before you lot proceed.
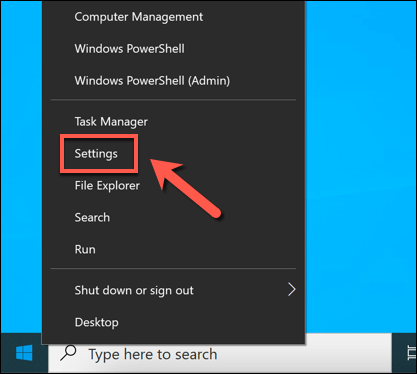
- To brainstorm, correct-click the Start menu and select Settings.
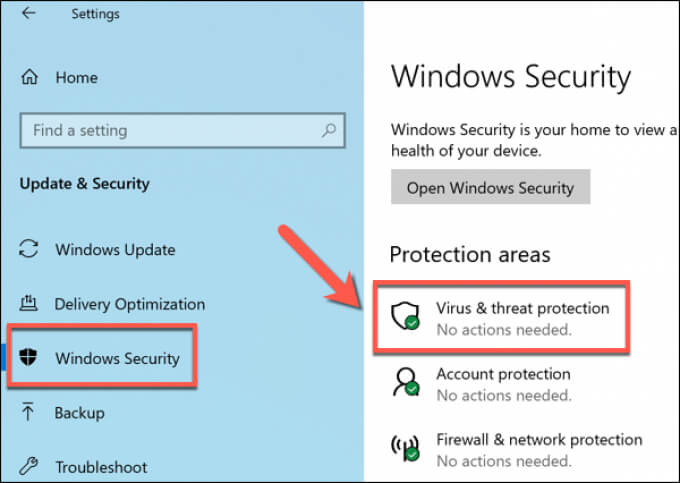
- In the Window Settings menu, select Update & Security > Windows Security > Virus & threat protection.
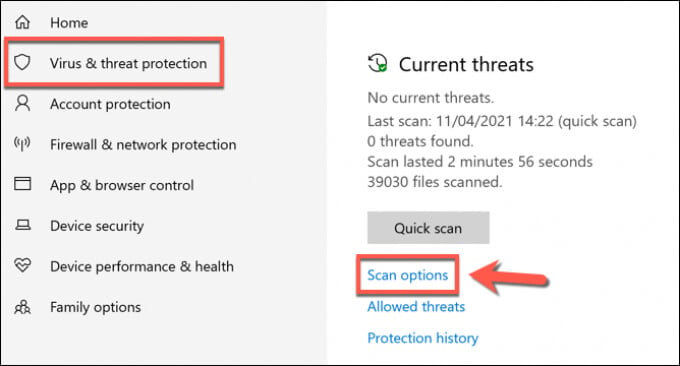
- In the Virus & threat protection menu, select Browse options.
- Select Microsoft Defender Offline browse from the list provided, so select Scan now to schedule the browse.
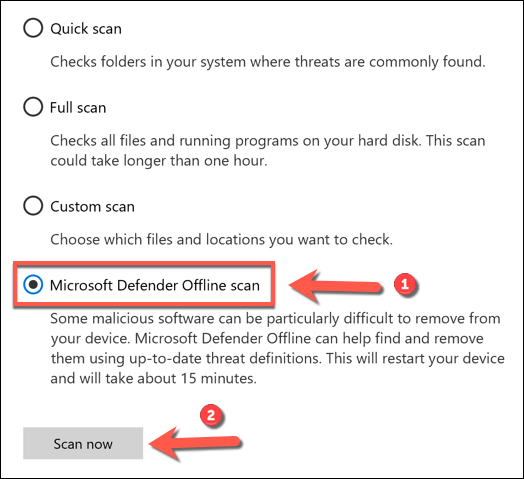
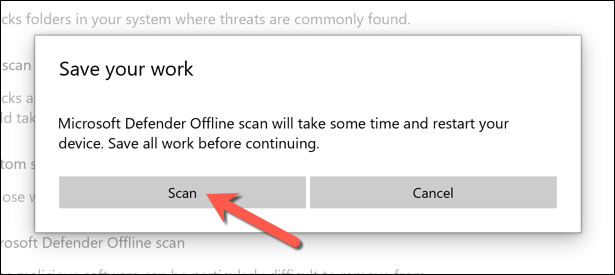
- Windows will confirm that your PC will need to restart. Close any unsaved applications at this point, then select Browse to restart your PC and begin the bootable antivirus scan using Microsoft Defender.
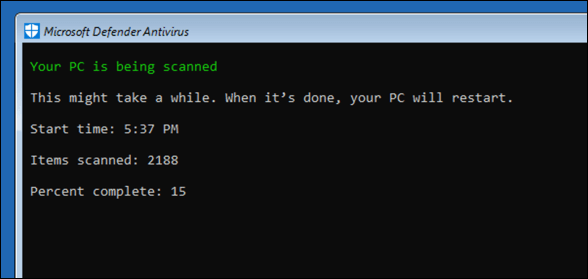
- Later a few moments, Windows will restart and kicking into the Microsoft Defender kick browse card. Microsoft Defender will automatically brainstorm scanning your PC for malware—permit this process to fully browse your PC. If it detects any malware, follow any additional on-screen instructions to confirm how yous wish to fix, remove, or quarantine any infected files.
Once the offline virus browse is complete, your PC will reboot back into Windows. Whatsoever malware volition exist removed or quarantined based on your actions in a higher place. At this signal, the malware infection should be resolved, but you may need to follow additional steps to repair or restore your Windows installation (depending on the impairment).
Using the Older Windows Defender Offline Tool to Scan for Malware (Older Versions of Windows)
While Windows x allows you to conduct an offline virus browse using Microsoft Defender without whatsoever additional tools or hardware, you lot can likewise employ the older Windows Defender Offline tool on a portable USB drive or DVD to conduct a kicking-level scan when Windows can't (or shouldn't) boot.
While this portable version of Defender was originally made for Windows 7 and 8.ane, it can nevertheless be used to scan for malware on some Windows 10 PCs, depending on the version. Nonetheless, the tool itself is outdated (although the virus definitions are up-to-date) and won't work with newer versions of Windows.
For this reason, this tool should only be used on older PCs running an older version of Windows 10 (or an earlier version of Windows). If it doesn't work, you may need to use a 3rd-party antivirus every bit an alternative, or schedule a Microsoft Defender Offline scan in Safe Mode using the steps above instead.
Creating the Windows Defender Offline Tool USB or DVD Media
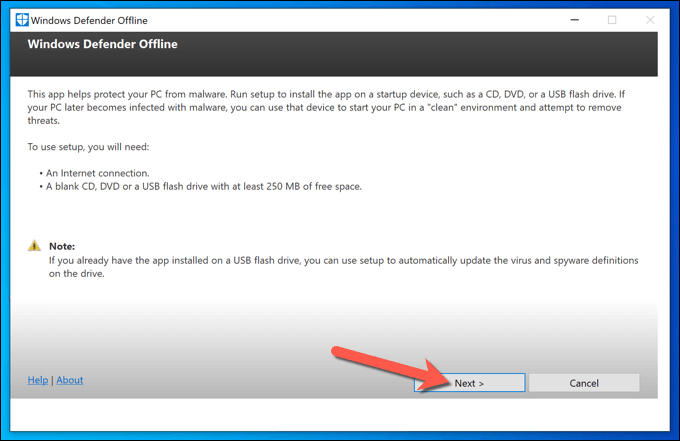
- If you lot want to try this method, you'll need to download the 64-flake version of Windows Defender Offline from the Microsoft website from a non-infected Windows PC. Once the file is downloaded, run the tool and select Next.
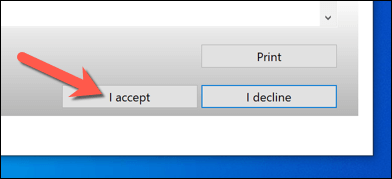
- At the next stage, ostend y'all accept the license understanding by selecting the I accept button.
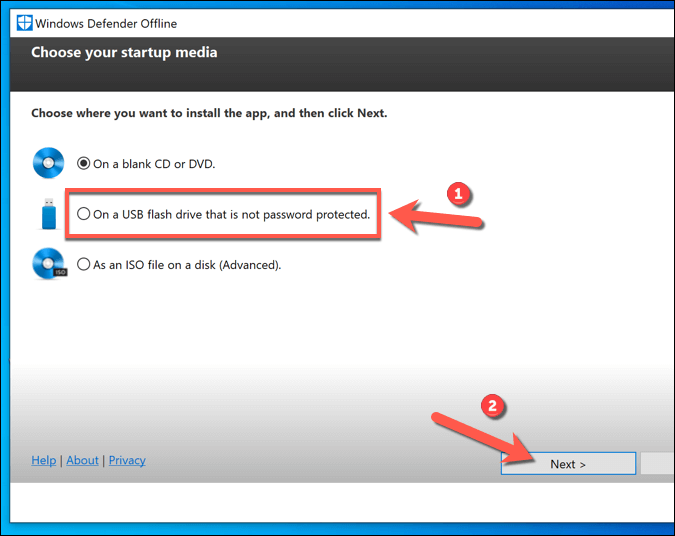
- You'll need to select where you want to install Windows Defender Offline. Select the appropriate pick (such equally On a USB flash drive that is not countersign protected) and then select Next to ostend.
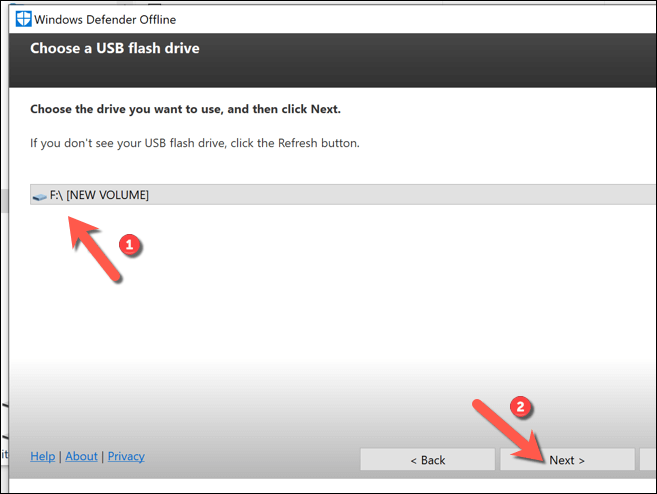
- If you lot're using the USB flash drive method and you accept more than one USB device continued, select the device y'all wish to utilize based on the assigned drive alphabetic character using the drib-down menu, then select the Side by side option.
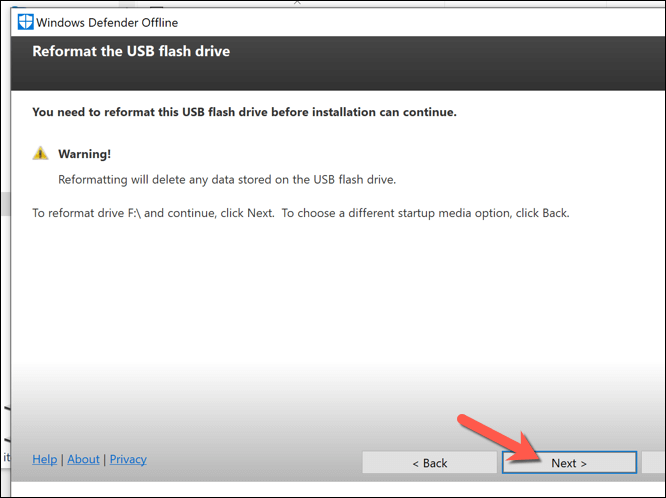
- The tool will format and reflash the USB drive yous've selected. Make sure to support any files previously saved to the device kickoff, then select Next to continue.
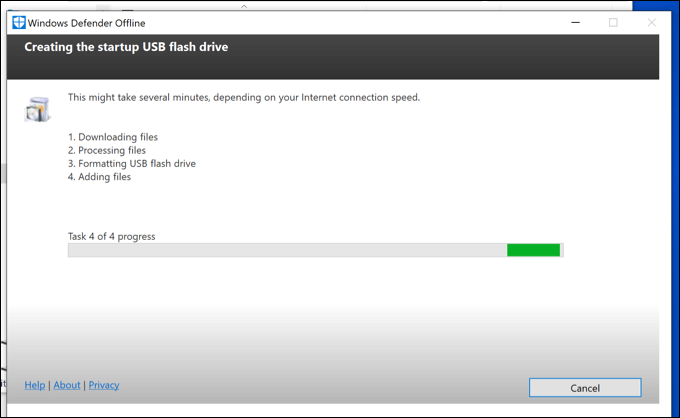
- The Windows Defender Offline creator tool will download the necessary files to flash your USB drive or DVD (including up-to-date virus definitions). Once the process is complete, you'll need to restart your PC.
Scanning Your PC Using the Windows Defender Offline USB or DVD Media
- When you restart your PC, you'll need to configure your BIOS or UEFI bootloader to kicking from your USB drive kickoff, rather than from your Windows organization bulldoze. Yous'll usually need to select a keyboard key such as F1, F12, or DEL to boot into this bill of fare and change these settings—consult your PC's user manual for additional information on how to do this, as the steps vary, depending on manufacturer.

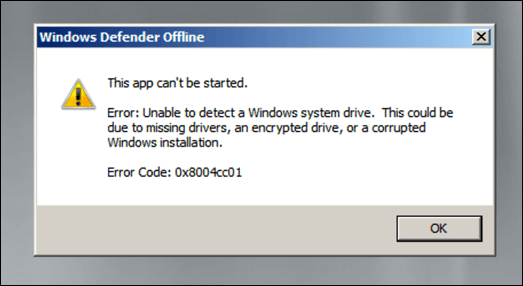
- One time you've changed your kick club, a minimal and isolated Windows environs running Windows Defender will kick. If your version of Windows x supports this tool, the scan options will become available to you. Otherwise, an 0x8004cc01 fault will announced, and you'll need to try an culling method.
- If Windows Defender tool tin run on your version of Windows 10, withal, follow the on-screen instructions to browse your PC and bargain with any infected files. One time the process is finished, your PC volition reboot and the malware should be removed. Brand sure to remove your USB drive or DVD at this point and restore the correct boot order in your BIOS or UEFI settings to ensure that Windows will correctly boot up afterwards.
Running an Offline Virus Scan Using Third-Party Antivirus Software
While Microsoft Defender is a suitable built-in antivirus for Windows 10 users, y'all can also utilise third-party antivirus tools to perform an offline virus scan of your PC. All major antivirus providers support this feature, including the free-to-use Avast Antivirus, although alternatives to Avast are available and are perfectly suitable.
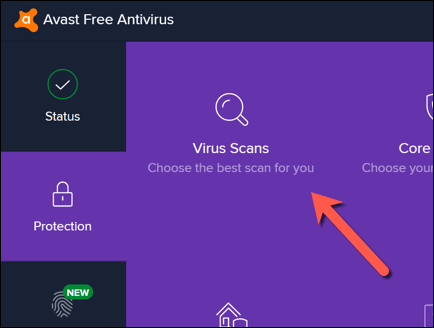
- To start, you'll need to download and install Avast on a non-infected PC (or, if that isn't possible, on your infected PC if your PC still boots). Once installed, open the Avast UI by selecting the Avast icon on the taskbar. From the Avast carte du jour, select Protection > Virus Scans.
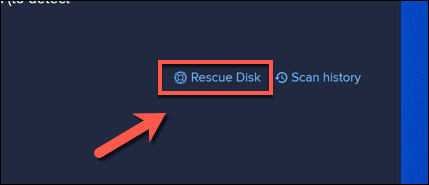
- In the Virus Scans carte du jour, select the Rescue Deejay choice.
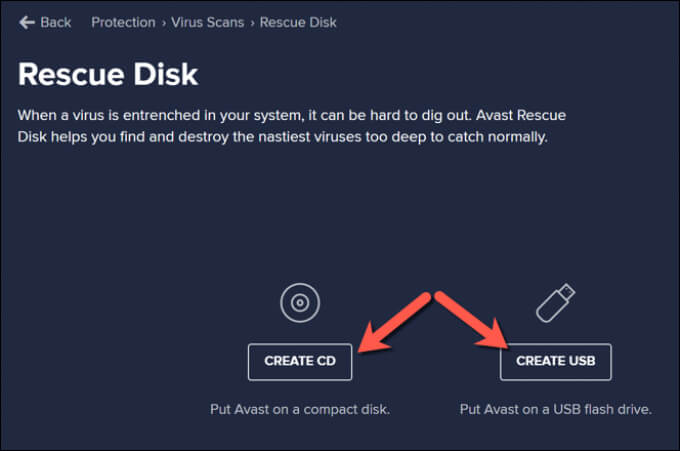
- If you lot'd prefer to create a rescue disk using a CD or DVD, select the Create CD. Otherwise, connect a portable USB flash drive and select Create USB instead.
- Avast will demand to format and reflash your drive with the correct files. Back up any files yous wish to salve from the bulldoze first, then select the Yeah, Overwrite button to proceed.

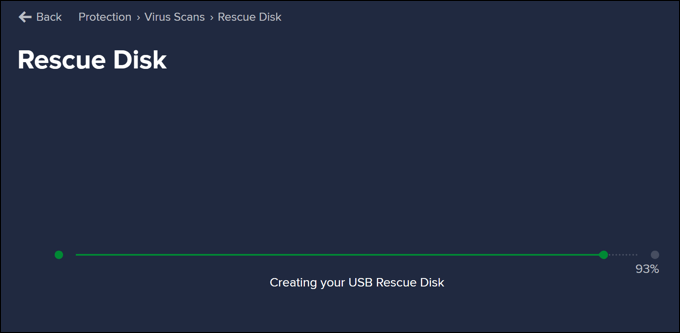
- Allow some time for the process to complete. Once Avast has created your rescue disk, safely remove it from the PC you're using and connect information technology to your infected PC. If you used your infected PC to create the Avast rescue disk, reboot your PC at this point.
- Earlier y'all boot into the Avast rescue disk, you'll need to change the kick order in your BIOS or UEFI settings by selecting F1, F12, DEL, or like key (depending on your hardware) to kicking into this carte. Make sure to prioritize the DVD or USB flash drive that y'all've created, and then restart your PC.
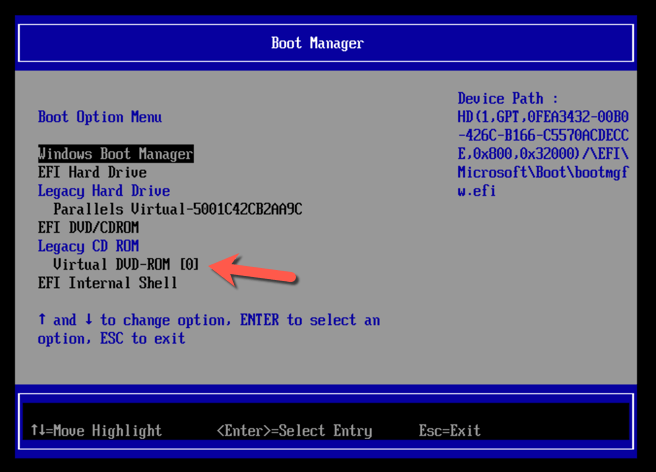
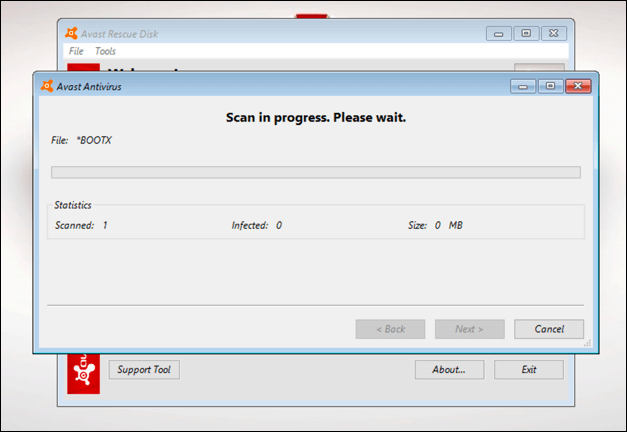
- In one case you restart, select any key on your keyboard to kicking into the Avast rescue disk. Using your mouse, select AvastPE Antivirus.

- In the Avast Antivirus options menu that appears next, y'all tin choose to scan all connected drives or only browse sure folders/files. Select your preferred option, then select Side by side.
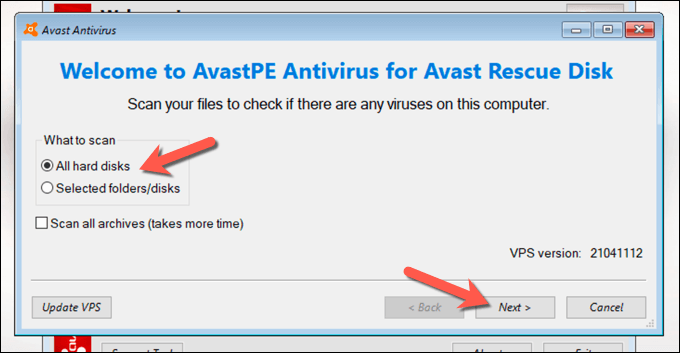
- Avast will begin to scan your drives to search for malware. Follow whatever additional on-screen instructions to confirm how you wish to handle infected files, such equally fixing, quarantining, or removing them.
One time the process is complete, leave the Avast rescue disk software, restart your PC, and remove the rescue disk to kicking into Windows. Yous may need to repeat the steps higher up to restore the original boot order in your BIOS or UEFI settings carte du jour before you tin do this, however.
Keeping Windows 10 Complimentary From Malware
Whether you're using Microsoft Defender or a third-party antivirus like Avast, you should exist able to use these tools to free your PC from a damaging malware infection. If yous're withal having issues, however, yous may need to recollect about wiping your hard drive and reinstalling Windows to starting time once again with no infected files.
While we've demonstrated how to use Avast to remove malware, it isn't the but third-party selection available. You can easily uninstall Avast on Windows and try some other solution similar Webroot instead. If all else fails, however, don't forget to use Microsoft Defender to quickly remove malware from your Windows PC.
Do not share my Personal Data.
Source: https://www.online-tech-tips.com/windows-10/how-to-perform-an-offline-virus-scan-to-fix-an-infected-pc/
Posted by: andersonpromple.blogspot.com
0 Response to "How To Scan Windows 8 For Virus"
Post a Comment